Installing an electric cooker may seem like a daunting affair, but with the right knowledge and preparation, it turns out to be a smooth and successful process. Upgrade from an older cooker or install a new one – proper installation is essential to safety, efficient performance, and a longer life of the equipment.
Here are 5 expert tips on how to have a successful electrical cooker installation that serves you for many years to come.
1. Know the Right Type of Cooker for Your Needs
Before going on to install an electric cooker, there has to be selection of the right electrical cooker for the kitchen. The types of electric cookers that are available in the market are many different from one another and vary greatly in terms of features and installation requirements. Knowing just what you need will enable you to make the best choice.

There are essentially three basic types of electrical cookers:
Freestanding Cookers: Both oven and hob are included, and can be plonked anywhere in your kitchen. They are the easiest to install and will take the least setup time.
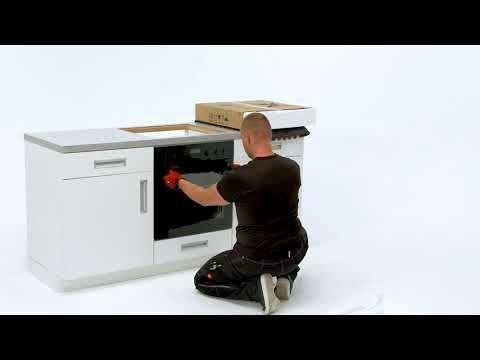
Built-in Cookers: Installed directly into your kitchen units, this one gives that sleek look towards modernity. The installation is more complex, involving custom cabinetry and fitting.
Double Ovens: Some electric cookers come as double ovens with additional space, which offers more space for cooking. It would be ideal for large families and even those who love hosting parties at home.
Electrical cooker models should be chosen considering the space available in the kitchen, the number of people usually cooked for, and the additional features that may be desired, such as self-cleaning, high efficiency in energy, or “smart” features. The more informed the decision is, the simpler the installation process would be.
2. Tap a Qualified Professional for Installation of an Electrical Cooker
The most important installation tips regarding the installation of an electrical cooker are to hire a professional to do it for you. While the idea of saving a few dollars may be tempting, the electrical cooker involves high-voltage connections and thus needs safety standards. Otherwise, improper installation may result in hazards from electricity, fires, or potential damage to the appliance.
A licensed electrician or professional installer can ensure that your cooker is installed safely and correctly. They also know the local building codes and comply with local regulations to provide an installation that is up to the law. In addition, using a professional will increase the chances of getting a warranty on the installation, which could help a lot in case things go wrong.
If you intend to install the cooker yourself, consider the appliance’s instructions and local building codes, for safety. You should also know that most manufacturers void the warranty if the cooker is not installed correctly or if an unqualified person installs it.
3. Clear the Installation Site in Advance
The installation area must be prepared before the actual installation of an electrical cooker takes place. Prepare the kitchen space by clearing all debris and other utensils, furniture so that it does not obstruct the installation site during the process.

Some guidelines on how to prepare the installation area are:
Provide for ventilation: In this case, proper ventilation allows the cooker to work perfectly. Check whether you have a vent system in your kitchen, which must be a range hood or an extractor fan, to remove smoke, steam, and odor out of the kitchen during cooking.
Check for Enough Power Supply: Electric cookers are wired and require an appropriate circuit with enough power to function. Most cookers will demand a 30-amp or 40-amp dedicated circuit, and it is important to ensure that your electrical system in the kitchen can accommodate the cooker. This becomes especially so when upgrading from a smaller, less powerful cooker.
Ensure Adequate Space: A free standing or built in cooker should be placed in an area with an ample size to accommodate it in a kitchen. For a free standing cooker, adequate clearance should be made to ensure ample airflow and comfort in use. In the case of an inbuilt cooker, the cabinetry must be well-sized to fit the cooker properly.
By preparing the installation area before hand, you will avoid delay and disruption on installing your cooker.
4. Installation Guidelines of the Manufacturer
As every electrical cooker manufacturer has already provided their specific set of installation guidelines, it becomes important to strictly follow them so that the installation can be properly and successfully done. Always read the manual and follow all the step-by-step instructions provided.
Here is why this step is so important:
Safety: The guidelines of manufacturers also ensure the appliance is safe to use. In this way, you are prevented from electrical hazards; besides, the cooker is safely connected to the power source.
Performance: To acquire ideal performance from the cooker, it has to be installed in an appropriate manner. Otherwise, improper installation may cause some imbalances such as uneven heating or a faulty control arrangement.
Warranty protection: From the above list, you already know that improper installation can void the warranty of your appliance. Therefore, ensure that you are following the guidelines of the manufacturer, whether installing by yourself or hiring a professional for this purpose.
The manufacturer’s guidelines will also notify you of specific tools or equipment that may be required in installing. For example, certain cookers will need additional fittings to work with gas connections or electrical connections.
5. Maintenance and Care for Long-Lasting Performance
Once installed, your electrical cooker requires proper care. You will see that the cookers are functional provided they are maintained, but most importantly, you will use more energy.

Here are some tips from which you will learn to follow the maintenance of your cookers:
Clean after each use: Always clean your cooker after each use. Avoid the gathering of grease, food debris, and spills. This will help in stopping fires that could be associated with any area of your cooker, ensuring your cooker stays looking fresh as well.
Check the Power Cord and Connections: Sometimes, your electrical connections and power cords become loose or damaged. Check them periodically to ensure that they have not become loose and are not worn out.
Cleaning Instructions should be followed: Most electric cookers have a self-cleaning facility or are cleaned using specific methods. Always refer to your user manual and follow the cleaning guide so that it does not get damaged.
Schedule Professional Inspections: Well, just like any other machine, it is always good to have your electrical cooker professionally inspected at times. This will make one detect issues beforehand before they turn into major problems and thus saving one money spent in repairing the cooker later in life.
Use Energy Wisely: Most of the modern-day cookers include the characteristic of energy saving. For example, the convection oven and induction hobs help the consumers to save on energy bills. Try to use all these features and to become efficient in cooking in order to consume energy within limits.
Conclusion
Electrical cooker installation: This is the first step towards making a kitchen work well and use energy resources efficiently. Following the expert tips, you can get a smooth installation process leading to long-lasting results. From choosing the right cooker to selecting a qualified professional and preparing the area for installation, every detail will lead you to success. Never forget to maintain your cooker in order to keep it in perfect shape for years ahead. So, with these tips in mind, you will enjoy the benefits of your new electrical cooker for many meals to come!
